http://butterpluscream.blogspot.com/
Basically, the girls post 2 different "piesignments" per month. Whoever chooses to participate bakes the designated pie and then blogs about it, while sharing their personal recipe. It's a great, fun way to pass around some quality pie secrets! This weeks recipe...CHERRY!!
I usually don't make cherry pie for two reasons...first, because I refuse to use the canned cherries and fresh ones are a bit pricey. Secondly, because I'm not the biggest cherry fan. After testing out & tweaking a new recipe, however, I'm in love! While it does take a bit of time & patience, I hope you take a bake break this summer to make this pie for your loved ones (or just yourself!). I promise you they'll be thankful you did. Enjoy!
I used Martha Stewart's COOKING SCHOOL book to make my Pate Brisee (pie crust). You could use a store bought one as well, but if you have a little time, this crust makes all the difference.
Ingredients:
2 + 3/4 cups all purpose flour
1 Tbsp sugar
1 + 1/2 tsp salt
2 + 1/4 sticks cold unsalted butter
7 Tbsp ice water
What to do:
Step 1- Combine flour, sugar, & salt in food processor. Pulse a couple times to combine.
Step 2-Cut butter into dice-sized cubes and add to flour mixture. Pulse until coarse (few seconds). Don't worry if you see clumps.
Step 3- Add in 7 Tbsp water (1Tbsp at a time) and pulse just until dough forms. As you can see below, the dough should be keep a slight crumbly texture.
Step 4-Place dough on a floured surface. It's very important to properly flour this area because your dough WILL stick otherwise. Divide dough in half, form 2 flat disks, and refrigerate for at least 1 hour. Don't worry. In this hour you can clean your kitchen & get started on the pie filling.
The Filling... (Ok, this is where things get very messy)
Ingredients:
2 pounds of fresh cherries
1/2 cup brown sugar
1/2 cup white sugar
1/4 tsp salt
1/4 tsp cinnamon
3 + 1/2 Tbsp cornstarch (this is used to thicken up the juices the cherries have)
2 tsp vanilla extract
Steps:
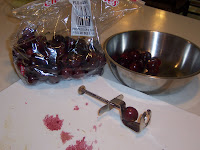
1. De-pit the cherries...not gonna lie, this step is the pits!! (HAHA-ok, i'm laughing at my own joke). I used a pitter but you could just as easily use a knife. Make sure you have a cutting board or a trash bag underneath this process because cherries STAIN. Also, wear gloves...your hands will look like you came out of a crime scene. I promise.
2. Place cherries in a large bowl & add all other ingredients listed above. Gently combine. Set aside, as this is the point where we assemble our pie.
3. Take one of your Pate Brisee disks out of the fridge. Liberally sprinkle flour over your work surface. Using a rolling pin, roll out your dough into a disk (about 1/2 in thick). Gently place at the bottom of your pie pan. The disk should be large enough to come up and over the edges of this pan. Don't worry if it's hanging over. We will take care of it later.
4. Take bowl of cherries and pour into the pie pan.
5. Next, take out your second disk from the fridge. Roll out onto a floured surface just as you did the first one. Using a paring knife, make ribbons, about an inch wide. See pic below.
6. Time for the lattice. Use about 5-6 "ribbons" and lay horizontally on the pie.
7. This step is MUCH easier if you have an extra set of hands. The reason being is that while you are laying down a vertical layer, your kitchen helper can lift the horizontal layers to create the basket weave appearance. Next...VOILA!!
8. Bake your pie in the center of the oven @ 375 F for 65 minutes (or until crust is golden & cherries are gently bubbling)
9. Finished product!!
Drooool. Serve at room temperature (yes, you have to wait) with a baby scoop of quality vanilla ice cream. MmMm! Hope y'all love this recipe.


No comments:
Post a Comment
Leave me your thoughts!!